Enlarge a Low-Resolution Photo for Print Without Pixelation
Before you upscale a low-res photo for print, check its pixels against the size: at 300 PPI a 4x6 needs 1200x1800. Here's what a 2x AI pass can rescue.

Contents
To enlarge a low-resolution photo for print without pixelation, read its pixel dimensions before anything else and compare them to the print size. At 300 PPI a 4x6 needs 1200x1800 pixels. Close to that number, a 2x AI upscale bridges the gap. Far below it, no tool rebuilds detail the camera never recorded. Native resizers only stretch what is already there.
First, check whether you need to upscale at all
Open the file and read its pixel dimensions before you touch any tool. Multiply the print size, in inches, by 300 and compare. A 4x6 needs 1200x1800 pixels for a sharp lab print; an 8x10 needs 2400x3000. If your file already clears that, enlarging it will only cost you edge sharpness for nothing. The cleanest fix is never landing here, which means starting from a high-resolution source whenever the choice is yours.
Finding the number takes five seconds. On iPhone, open the photo and tap the info button; the dimensions sit right under the date. On Windows, right-click the file, hit Properties, then Details. In macOS Preview, use Tools then Show Inspector. That reading is the whole decision, and it is the step most people skip on the way to a blurry print.
Here is the target most photo labs work to, straight from a lab’s own resolution chart:
| Print size | Minimum pixels at 300 PPI |
|---|---|
| 4 x 6 in | 1200 x 1800 |
| 5 x 7 in | 1500 x 2100 |
| 8 x 10 in | 2400 x 3000 |
| 11 x 14 in | 3300 x 4200 |
| 16 x 20 in | 4800 x 6000 |
The arithmetic behind the table is just the print-resolution math: pixels divided by PPI equals inches, so 3000 pixels at 300 PPI covers 10 inches of paper. Around 300 PPI is the standard goal for photographs, and 200 is about as low as you want to go before a print held at reading distance starts to look soft.
The native way to enlarge, and why it goes soft
Both desktops can do this without a download. In macOS Preview, open Tools then Adjust Size and type the larger dimensions. On Windows, open the file in Paint and use Resize. The same native apps that shrink an iPhone photo can push one bigger, too.
The catch is what happens underneath. To invent the new pixels, these tools interpolate (a weighted average of neighboring pixels), estimating the color of each added pixel rather than recovering any detail that was never in the file. So the image gets larger and the edges get fuzzier at the same time. A logo’s counter-forms fill in, a hairline rule doubles into a gray smear, and small text loses its crispness. You can run a sharpening pass afterward, but that is damage control, not a rescue. For a modest bump this is fine. Push much further and it falls apart.
When a 2x AI pass actually helps
An AI upscaler works differently. RoundCut’s 2x upscale doubles the width and the height, so a 900x900 avatar comes out 1800x1800 (four times the pixels). Instead of averaging its neighbors, the model predicts what the missing texture probably looked like, based on patterns it learned from its training data. It runs in your browser, on a JPG or PNG, and the file never leaves your device.
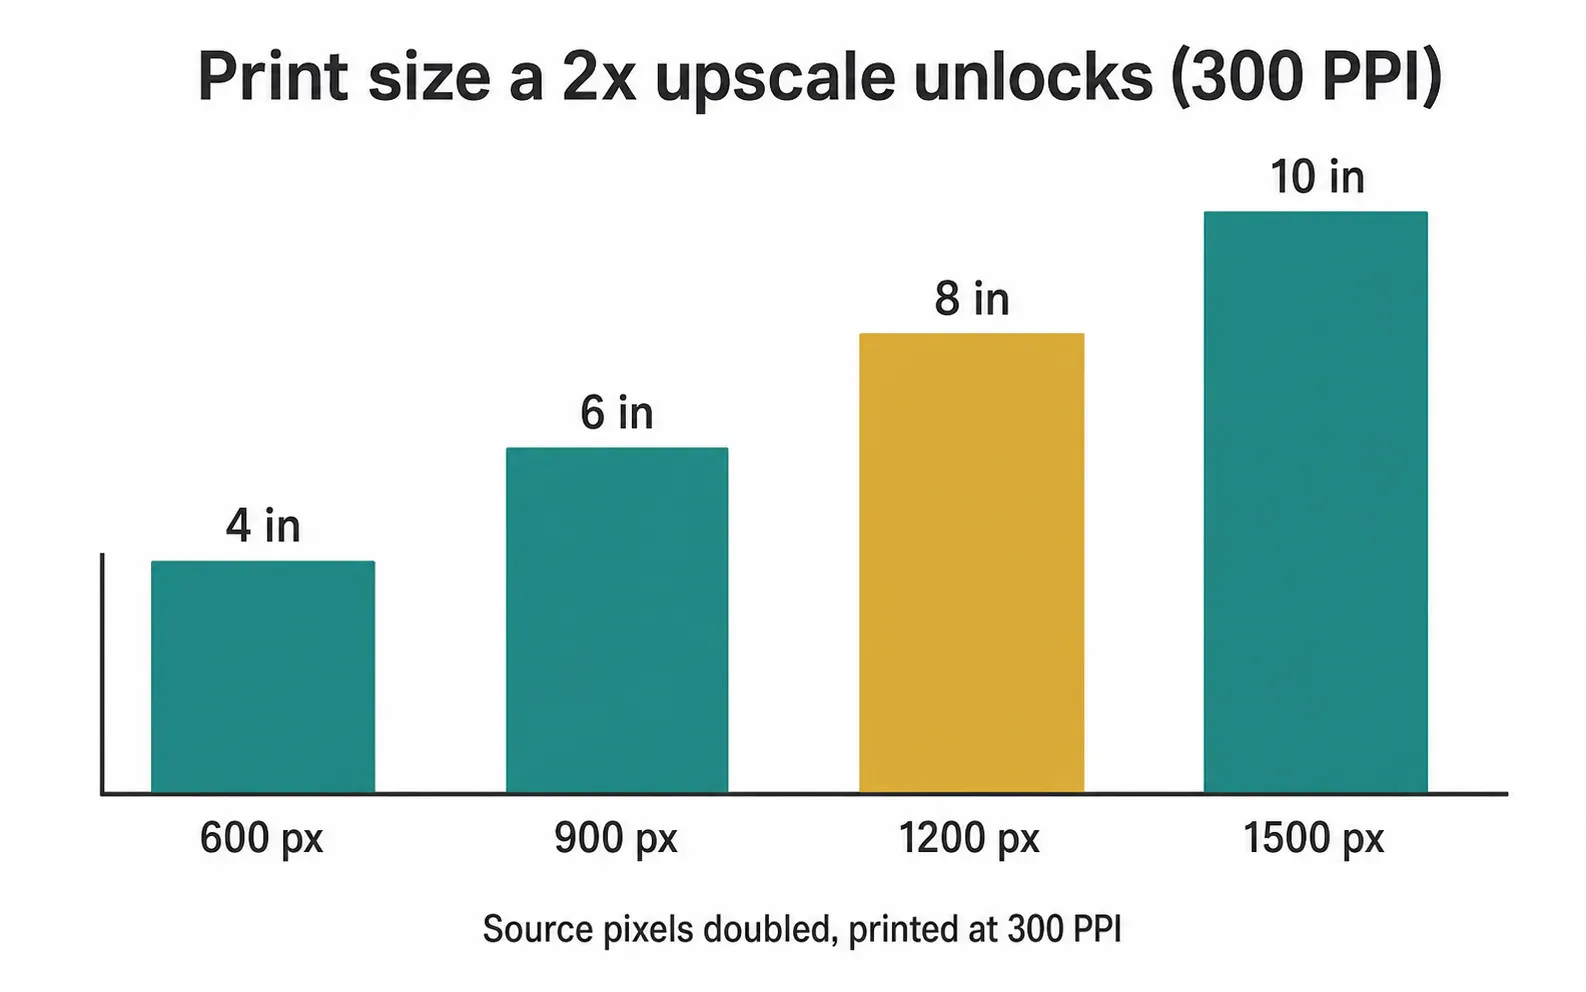
That prediction is the strength and the ceiling. It is an approximation, not a recovery, so treat the output as a plausible reconstruction rather than the original in disguise. Three honest limits keep it from being magic:
- It’s 2x, not infinite. A 400x400 thumbnail lands at 800x800, still short of an 8x10. Upscale rescues a near-miss, not a disaster.
- Heavily compressed JPGs fight it. Blocky artifacts get sharpened into visible edges instead of disappearing.
- It can invent detail. Fine patterns like hair or small type sometimes come back subtly wrong.
Below a real floor, a tiny and blurry source, even a strong model shows no meaningful gain. I’ve watched a low-res logo lifted off a website go to mush at every size a client tried, because the pixels a screenshot never captured are not hiding inside a smaller copy. Run RoundCut Upscale when the file is one size short, not five.
Match the file to the print size and the viewing distance
The 300 PPI target assumes something you hold at reading distance: a photo book, a 5x7 on a desk, an Etsy sticker sheet. A poster you view from across a room is a different problem. Following HP’s large-format guidance, a poster prints cleanly at 150 to 300 dpi, and 150 is plenty once the viewer stands a few feet back, because the eye stops resolving fine detail at distance. So a 3000x2000 file that’s marginal for a glossy 8x10 is comfortable for a poster viewed from across the room.
Sizing a batch to match is its own step, and the uniform-photo method in this guide for a storefront works here too: pick the target pixels once, apply to the set. Once the resolution clears the bar, get each file ready in order:
- Upscale first, while the pixel count is the only thing you’re changing.
- Then use RoundCut Resize to hit the exact pixel size the lab asks for.
- If the print service caps upload size, run RoundCut Compress at high quality so it clears the limit without visible loss.
My rule after years of watching this go wrong: never upscale a file that already meets the target. You pay in processing time and a small artifact risk for a print nobody can tell apart from the original.
The same discipline that keeps a blurry profile photo sharp applies on paper. It matters most when you’re prepping artwork for print on stickers or a poster, where a reprint costs real money and starting bigger than you think you need is the cheap insurance.
So before you drag anything into an upscaler, read the pixel dimensions and multiply by 300. If the number’s already there, send it to the lab as-is and skip the round trip. If it’s a little short, one 2x pass buys you a print size. If it’s tiny, go find the file that isn’t.


